Sharing Files
Clicking the share icon on any file or folder opens the Details view on the right, where the Share tab has focus.
Sharing Status Icons
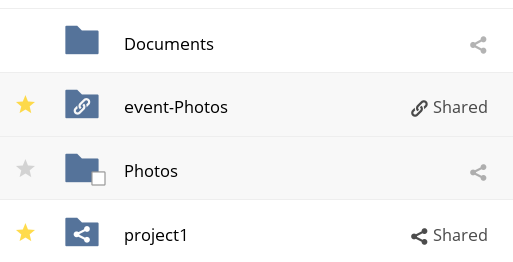
Any folder that has been shared is marked with the Shared overlay icon.
Public link shares are marked with a chain link. Un-shared folders are blank.
If your ownCloud server is the Enterprise edition, you may also have access to Sharepoint and Windows Network Drive file shares. These have special status icons. An icon with a red plugin and background means you have to enter a login to get access to the share.

Creating Shares
To share a file or folder, immediately below the Share tab, you will see a text field. In this field, you can enter any number of users (whether local to your ownCloud server or remote) or groups who you would like to share the file or folder with.
If username auto-completion is enabled, when you start typing the user or group name ownCloud will automatically complete it for you, if possible.
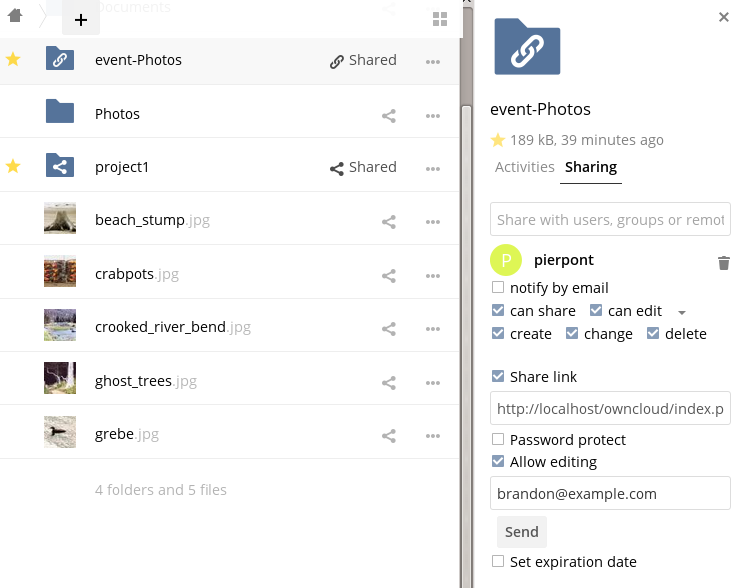
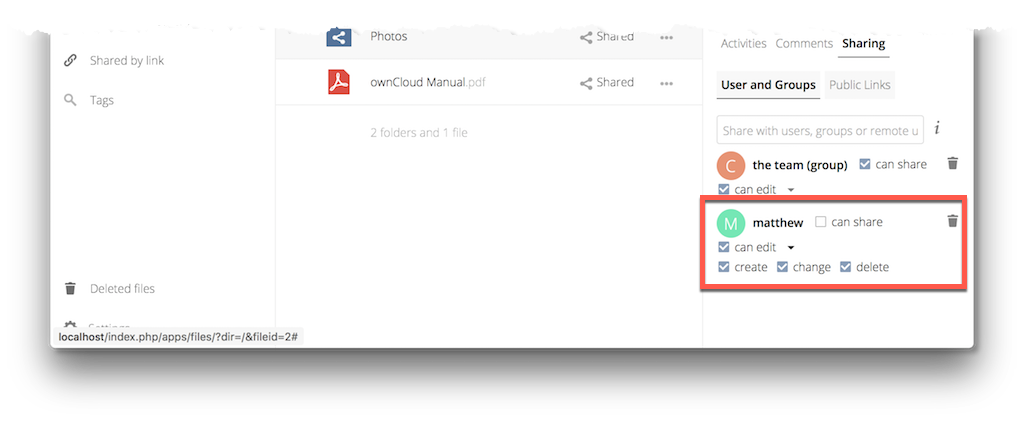
After a file or folder has been shared, Share Permissions can be set on it. In the image below, you can see that the directory “event-Photos” is shared with the user “pierpont”, who can share, edit, create, change, and delete the directory.
What Happens When Share Recipients Move Files and Folders?
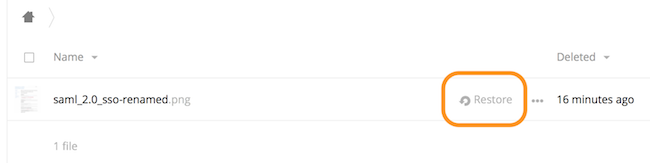
If a share recipient has “can edit” privileges and moves files or folders out of the share, ownCloud stores a backup copy of the moved file/folder in the Deleted Files (Trash) of the share’s owner. The user who moved the file/folder out of the share still has the original copy there, along with its attached metadata.
That way, the files/folders are not permanently lost. By clicking the Restore link, next to the respective file or folder, ownCloud will restore these files/folders to their original location.
Note
Restoring files restores the backup copy for all users, including the user that originally moved them, into the original folder.
Sharing Files with Guest Users
Users can also share files and folders with guest users. To do so, your ownCloud administrator will need to have installed the Guest application.
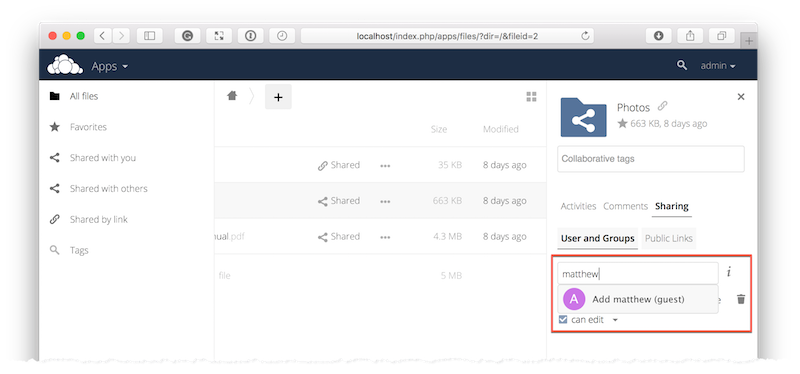
If it’s already installed, in the “User and Groups” field of the Sharing panel, type the username of a user who is not already a user in your ownCloud installation.
You will then see a popup appear with the suffix (guest), as in the screenshot below.
After you click the username in the list, you’ll see a modal dialog appear, where you can add the new user to the list of guest users.
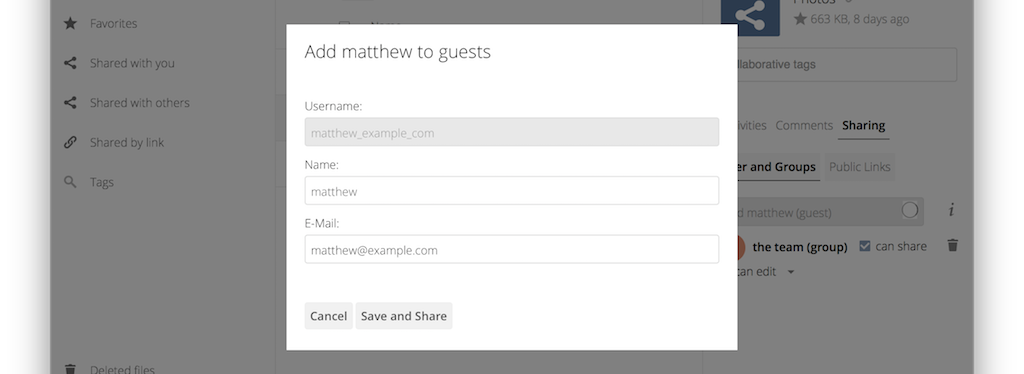
The Name field will be pre-filled with the username you supplied. All you need to do is add the user’s email address, and click “Save and Share”. After you do that, the content will be shared with the user with all permissions applied, except for the ability to share with other users.
Password Protecting Files
It’s also possible to password protect shared files and folders. If you want to do so, then you need to enable this functionality. Specifically, click the checkbox labeled “Password protect” under the “Share Link” section.
When you do so, you’ll see a password field appear. In there, add the password that the user will need to enter to access the shared resource and press the return key.
Using Private Links
Another way to access a file or folder is via a private link. It’s a handy way of creating a permanent link for yourself or to point others to a file or folder, within a share, more efficiently. To access the private link, in the Sharing Panel for a file or folder, next to its name you’ll see a small link icon (1), as in the screenshot below.
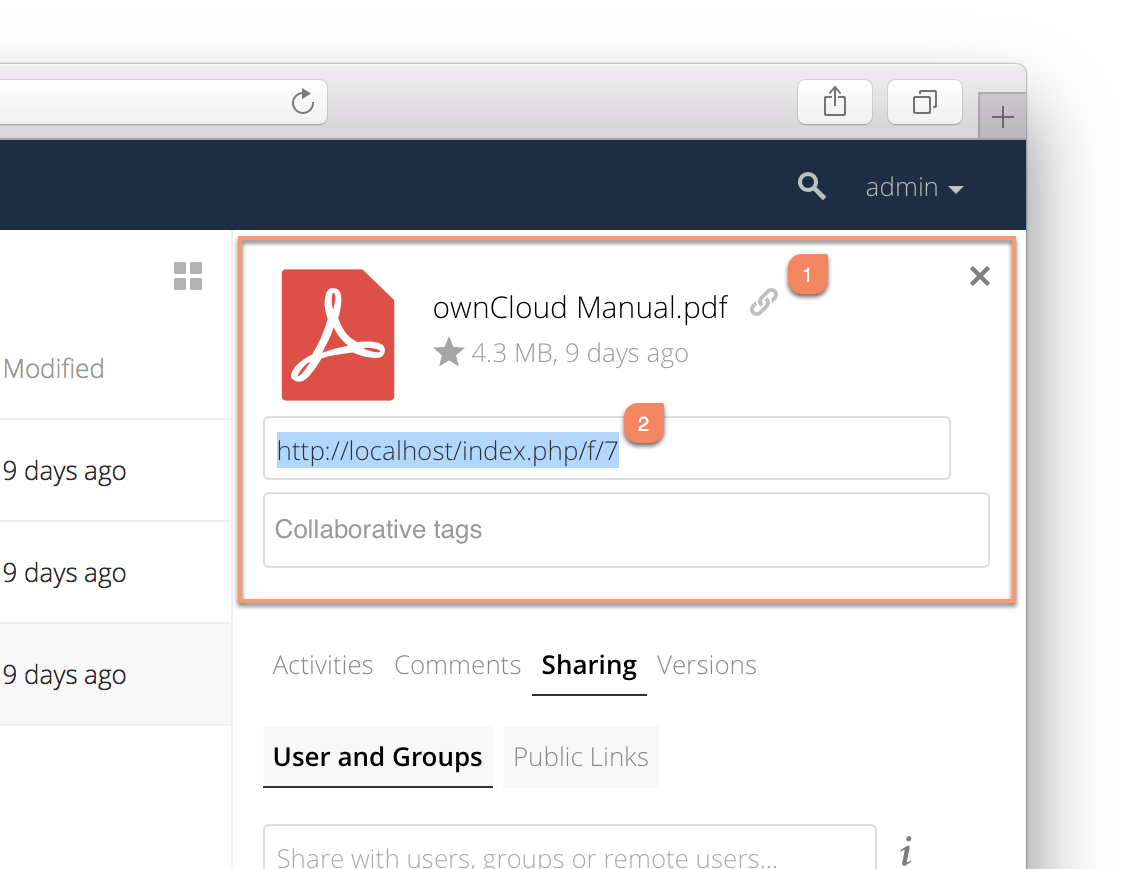
If you click it, a new textbox will appear above the “Collaborative tags” field, populated with the link’s URI (2).
Note
Only people who have access to the file or folder can use the link.
Creating Drop Folders
As of ownCloud version 10.0.2, users can create upload-only, public shares (otherwise known as “Drop Folders”). Drop Folders allow users to upload files to a central location, but don’t allow them to either see or change any existing files, which already have been uploaded.
To create one:
- View the sharing panel of the folder that you want to share as a Drop Folder, and under “Public Links” select “Create public link”.
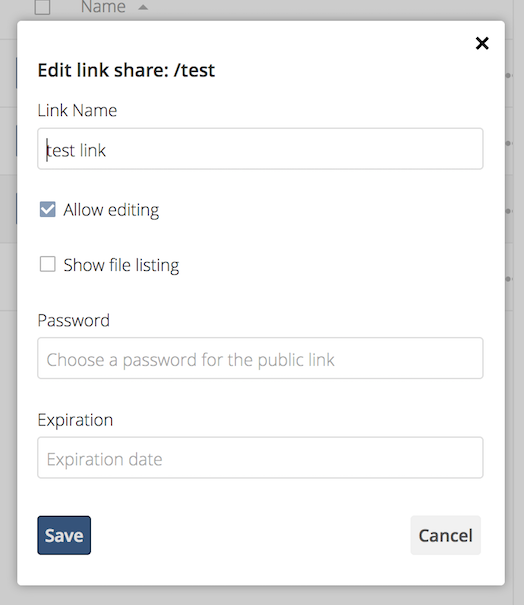
- As with other shares, provide the name in the “Link Name” field.
- Check “Allow editing”, un-check “Show file listing”, and then un-check “Allow editing”.
- Finally, click “Save” to complete creation of the share.
Now, as with other public links, you can copy the link to the share and give it out, as and when necessary.
Using Drop Folders
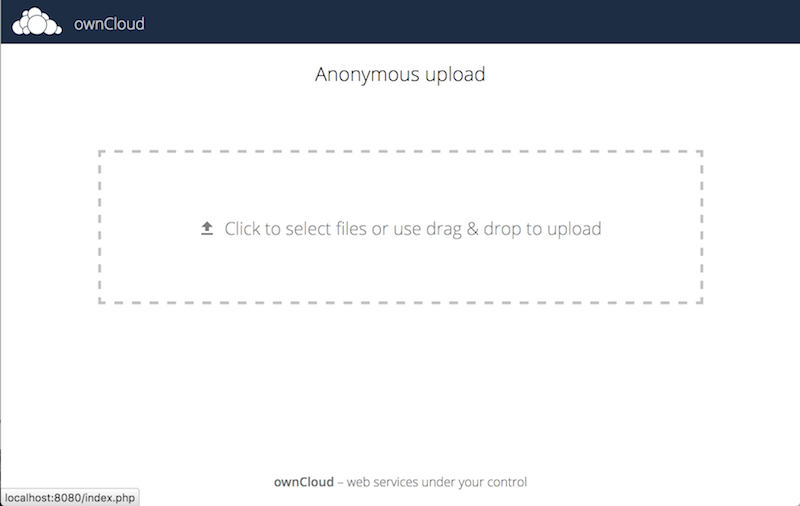
When users open the share link, they will see a page where they can either click to select files to share, or drag-and-drop files directly to share them. After the file’s been successfully uploaded, they’ll see (where possible) a preview of the file that has been uploaded.